Today I thought I would share a method that I've used to make personal vintage inspired greeting cards in the past. This is helpful if you are ever in a pinch and need a cute little card fairly fast, or just if you'd like to take a more handmade (and not very costly) approach to things.
Here is what you will need:
- images of your choosing
- markers or paints to write with
- white paper to write on
- thick paper of your choosing to print on
- a scanner
- a printer
- image editing software
- a ruler
First, decide on your image. These cards are based on the square retro Instagram style, but there are various ways to get this look. The three easiest ways to get a vintage inspired image would be:
- Any old photographs you already have that you can scan in to your computer and crop square.
- Using your Instagram app. If you don't already use this, it is a quick and easy way to photograph square/vintage inspired images... best of all it is free. I find the quickest way to get an individual image from this app to my computer is to email it to myself. If you are looking to get a bunch of images off of your Instagram, hooking your device up to the computer and copying the files would be quicker.
- If you have Photoshop, you can just crop your image square and then use any of the large amount of free Photoshop actions (that can be downloaded via the internet) to get an older look to your photo.
*** You'll want to make sure that your image is somewhere in the range of 4x4
inches to 5x5 inches. Instagram files aren't that large to begin with,
so usually this size works for keeping them at a decent quality for
printing. This size also works well because anything that is within the
range of 4 to 5 inches will double to 8 to 10 inches for the full open
card size, fitting everything on a standard sheet of paper. ***
Once you have your image, it is time to figure out what you would like your message to be. Using markers or paint, write out the front of the card's text and, once it dries, scan it in to the computer. Keep in mind that the thicker you make your text, the more imperfections and inconsistencies will show up once it is scanned in. If that is not the look you are going for, you might want to stick to thinner lettering or, if it is available to you, use the Live Trace option in the program Illustrator to clean up line work.
At this point, you want to open up the photograph and the text scan files in Photoshop (or any similar image editing software you may have yourself). Drag the text scan over on to the photograph file, creating a new layer in the process. Go to your layer menu, and change the blending to "multiply" in the drop down menu for the text layer. The white of the paper should disappear, leaving only your text. Reposition, and resize the text layer to go with the image underneath however you see fit. You may also need to play with the hue, color, or saturation of the text layer a bit depending on if the "multiply" blending changed its appearance. Before printing, you may have to rotate your image depending on where you want it to fold. For example, the card below is top folding, so I had to move the image to the very bottom of the page in the print page layout options. If you want a fold on the side, you will have to change the page layout to horizontal on the print page layout options and then move the image all the way to the right of the page.
Once the image has printed, wait for the ink to completely dry so that the following steps do not cause the ink to smear and smudge.
(For this next part, some people may prefer to lay out the size of it all in Photoshop and
print light trim lines on the paper. The only problem with this is if
you don't cut everything exactly, you will still have some ink showing
from the trim marks, as opposed to light pencil marks that can be erased
if necessary.) For a top folding card, measure how tall your image is. Lightly pencil in the same measurements exactly above your image on the paper. Basically, just double the height of your original image. So if your image was originally 4 inches wide and 4 inches tall, you should now have a pencil drawn box above it also measuring 4 inches wide and 4 inches tall, totaling 8 inches tall. Once this is all drawn out, you can now cut out your card. Afterwards, fold your card in half, write whatever message you desire inside, and you are good to go.
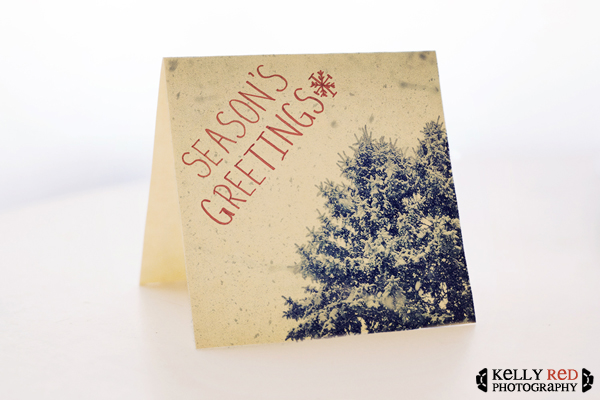
I had a bunch of manila folders sitting in a box, so I cut those down to standard paper sizes and I ran them through the printer to create an even more aged looking card:
The image below shows what the photo looked like before being printed on the manila folder. You could always use white card stock or any other light-colored paper, based on your own preference.
Here are examples of a few other cards. The lettering is done with either marker or paint. You can make your lettering as technical or as free form as you like, depending on the look you are going for. I kept mine pretty simplistic for this set, but feel free to doodle or be as elaborate as you wish.
The good thing about these is that if you decide to make a bunch of them, you have a good idea of what all of your card dimensions will be and you can just purchase a packet of square envelopes to put them in. If you want to go the totally handmade route, you can find plenty of tutorials online about how to make your own envelopes. If you do choose this route, just remember to check the size specifications on the postal service's website to make sure that your envelope sizes conform to their guidelines and can be mailed.
Have fun!